
A Guide to Vacuum Packaging Bags for NZ Hospitality
Friday prep is done, the coolroom is full, and by Sunday night a few trays already look tired. A steak portion has darkened at the edges. Grated cheese has started to dry out. A sauce batch is still usable, but no one's fully confident about how long it's been sitting in a covered container. That's where food cost leaks.
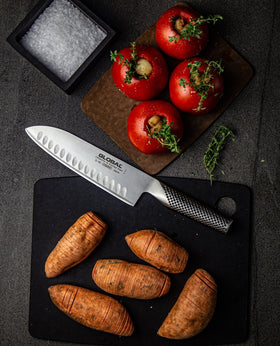
Vacuum packaging bags solve a very practical problem in hospitality. They help kitchens hold product in a tighter, cleaner, more controlled state, so prep lasts longer, portions stay consistent, and staff waste less time rewrapping, relabelling, and second-guessing whether something is still fit for service. In a New Zealand kitchen, that matters even more when product has travelled, margins are tight, and chilled storage has to work hard.
Why Vacuum Packaging Bags Are a Kitchen Staple
You see the difference at service. One eye fillet has held its colour, the grated parmesan is still workable, and the veal jus from Thursday is packed, dated, and easy to trace. The same products left under wrap or in a tub usually tell a different story by the end of the weekend.
Vacuum packaging bags support three jobs at once in a commercial kitchen. They protect product quality, tighten portion control, and make chilled storage easier to manage. That matters because oxygen and loose storage speed up the problems kitchens pay for first: discolouration, surface drying, flavour transfer, messy rotation, and stock that gets binned because no one trusts it.
Removing air before sealing helps slow oxidation and reduces exposure that lets food deteriorate faster. In practice, that gives kitchens a better holding format for meat, seafood, cheese, cooked components, and prep for sous vide. The bag is not the whole system, but it gives the sealer, the label, and the coolroom a format staff can use properly.
What changes in daily kitchen work
Loose wrap and lidded containers still have their place. They are fine for short-term holding and fast access. They are weaker at protecting high-value or pre-portioned food over several days, especially once the pack has been opened, handled, or stacked in a busy coolroom.
A properly matched vacuum bag improves day-to-day control in ways staff notice quickly:
- Portions stay consistent because proteins, sauces, and prep items can be packed in exact service quantities
- Waste drops because less product is exposed to air, moisture loss, and coolroom cross-odour
- Rotation gets easier because sealed, labelled packs are faster to identify and less likely to be pushed to the back and forgotten
- Sous vide prep becomes more reliable because the product is already packed in a controlled, repeatable format
That last point matters for food safety as much as convenience. Vacuum bags can extend holding time, but they also change the storage environment, which means staff need clear rules on labelling, chilling, and cooking. That is one reason many operators standardise on commercial vacuum pack bags for portioning and chilled storage instead of treating bags as a generic consumable.
Why it matters in New Zealand
NZ kitchens feel waste quickly. Proteins are expensive, freight adds cost, and coolroom space is never as generous as the plan said it would be. If a bag helps hold a trimmed sirloin, a smoked fish portion, or a batch sauce in saleable condition for longer, that is not a packaging win. It is a margin win.
The practical benefit is discipline. Vacuum-packed stock is easier to stack, date, count, and issue. That helps restaurants with heavy prep, caterers moving food off-site, accommodation kitchens managing variable covers, and care facilities that need consistency from shift to shift.
Where vacuum bags earn their keep
Vacuum bags pay for themselves fastest on products with a high food-cost risk or a short quality window. Common examples include:
- Portioned proteins where colour, yield, and portion accuracy affect gross profit
- Cheese, charcuterie, and sliced meats that dry out or taint easily once opened
- Sauces, stocks, and soups that need organised chilled storage and clear date control
- Prepped vegetables that lose moisture and texture after cutting
- Marinated items that need tidy storage and predictable handling
Used well, vacuum packaging bags reduce the number of judgement calls staff make during service. This explains why they have become standard in professional kitchens. Less guesswork, less waste, and a clearer line between safe stock and stock that should not go out.
Choosing Your Bag Type and Material
The first bag decision isn't about thickness. It's about the machine sitting on the bench.
A lot of buying mistakes happen because operators order a bag that doesn't match their sealer. If the machine and bag type don't line up, the pack won't evacuate properly, staff fight the process, and the product ends up back in a container anyway.

The two main bag formats
External sealer bags need a textured or channelled surface. Those embossed channels give the machine a path to pull air out from the mouth of the bag. Use a smooth pouch in that style of machine and the air path closes too early.
Chamber pouches are smooth. Because the whole bag sits inside the chamber during sealing, the machine doesn't need embossed channels to evacuate air. That's why chamber bags are usually the standard choice in higher-volume commercial kitchens.
Here's the practical comparison.
| Feature | Chamber Pouches (Smooth) | External Sealer Bags (Textured/Channelled) |
|---|---|---|
| Machine type | Chamber vacuum sealer | External or clamp-style vacuum sealer |
| Surface | Smooth | Embossed or textured |
| Air removal method | Air removed inside the chamber | Air drawn through bag channels |
| Typical kitchen fit | Higher-volume prep and portioning | Smaller-scale or lighter-duty use |
| Pack appearance | Clean and uniform | Functional, with visible texture |
| Buying consideration | Match size and barrier to product | Make sure channel pattern suits machine use |
For kitchens buying consumables for a chamber machine, Enduro vacuum pack bags are one example of the smooth-pouch format used for commercial sealing.
Material matters more than many buyers realise
Most commercial vacuum packaging bags use a multi-layer PA/PE structure, according to Kanzo Pack's material guide. The PA layer provides puncture resistance and tensile strength, while the PE layer provides the heat-seal surface.
That construction makes sense in kitchen terms:
- PA helps the bag survive handling. Sharp corners, rough product surfaces, stacked packs, and freezer movement put stress on the pouch.
- PE makes sealing reliable. If the seal layer doesn't perform well, nothing else matters.
Some products need more than a standard PA/PE build. Higher-performance bags may include EVOH or other barrier upgrades to reduce oxygen and moisture transmission. That's relevant for chilled proteins, seafood, cheese, and freezer-held product where oxidation, moisture loss, and freezer burn create real cost.
A bag that punctures in storage is expensive, even if it looked cheap on the invoice.
Don't overbuy barrier if the menu doesn't need it
Practical purchasing decisions are essential here. High-barrier bags have a role, but they're not automatically the right answer for every item.
Use a stronger barrier when the product is:
- stored chilled for longer holding
- highly sensitive to oxidation
- likely to dry out or suffer freezer burn
- valuable enough that appearance and yield matter
A simpler bag often does the job for:
- short-turn prep
- same-week portioning
- low-risk cooked items
- products packed mainly for organisation rather than extended storage
The right choice depends on the menu and the holding method, not marketing language.
Match the bag choice to the rest of the cold line
Bag selection also needs to fit the kitchen's refrigeration workflow. In prep areas where staff need fast access to chilled mise en place, units like the Atosa Sliding Lid Saladette Fridges support organised ingredient handling with quick access, stainless construction, and consistent temperatures in demanding commercial environments. That's useful for ingredients used fresh through service, while vacuum packaging bags are better suited to protected holding, portioning, and back-up prep stored more securely between runs.
A simple rule helps. Use open-access refrigerated storage for active service ingredients. Use vacuum packaging bags for controlled holding, batch prep, and items where spoilage risk rises fast once exposed to air.
Matching Bag Specifications to Your Menu
The machine decides the bag format. The menu decides the bag specification.
That's where a lot of kitchens leave money on the table. They buy one bag size, one thickness, and try to make it suit everything from fish fillets to lamb racks to curry base. It works badly. The wrong bag wastes plastic, slows packing, and causes punctures or ugly seals.

Why specifications exist at all
Vacuum packaging became industrial for a reason. A major turning point came in 1963, when Karl Busch introduced the first industrial-sized vacuum packaging machines, building on earlier wartime discoveries that vacuum-packed meat could be stored for much longer, as noted in Boya's history of vacuum packaging bags. Once vacuum packing moved into serious food operations, bag specification stopped being incidental. It became part of process control.
That still applies in hospitality. The bag has to suit the food, the handling, and the storage method.
Build a bag map from the menu
A useful way to buy vacuum packaging bags is to map them against actual product categories.
Start with four groups:
-
Soft, low-risk items
Cooked sauces, peeled vegetables, sliced deli product, grated cheese, and soft prepared items usually don't challenge the bag physically. -
Moist and heavy portions
Wet marinades, braised components, soups, and stews need enough width and headspace to seal cleanly without product contaminating the seal area. -
Sharp-edged or hard items
Bone-in cuts, shellfish, crusty frozen components, and products with corners or hard points demand stronger puncture resistance. -
Appearance-sensitive stock
Premium proteins and retail-style presentation packs often justify a cleaner fit and a bag size that leaves less dead space.
What to check before ordering
Don't leave sizing to guesswork. Lay out the product exactly as staff portion it, then choose a pouch that gives enough room for filling, vacuum draw, and a clean seal line.
Use this buying checklist:
- Product shape first. A flat fish fillet and a thick lamb shoulder need different bag dimensions even if the weight is similar.
- Seal allowance matters. If the bag is too short, staff overfill it and the seal line gets wet or greasy.
- Puncture risk changes everything. If the product has bones, shells, or sharp frozen edges, move to a tougher specification.
- Excess bag length is waste. It increases material use and makes the pack look loose.
If staff have to fight the bag to get a clean seal, the specification is wrong, not the staff.
A practical menu-to-bag approach
A compact purchasing plan usually works better than a huge range. Many kitchens can simplify to a small set of core bag sizes and hold one heavier-duty option for risky items.
For example:
- a smaller pouch for single protein portions
- a medium pouch for cooked components and cheese
- a larger pouch for sauces, soups, and bulk prep
- one tougher bag reserved for bone-in or puncture-prone products
That approach keeps ordering manageable without forcing every item into the same pouch.
Perfecting the Seal Every Time
A vacuum bag only protects food if the seal holds. Most failures don't come from the bag itself. They come from rushed filling, poor machine settings, or contamination on the seal area.
A leaking pack wastes more than plastic. It wastes product, labour, labels, storage space, and trust in the process. Once staff stop believing the seal will hold, they start double-handling everything.

What usually goes wrong
Three faults show up again and again in commercial kitchens:
- Liquid or grease on the seal line
- Wrinkles at the mouth of the bag
- Heat settings that don't match the pouch
All three create weak points. Sometimes the pack fails immediately. Sometimes it looks sealed, then slowly loses vacuum in the coolroom.
Clean technique beats rushing
Staff don't need complicated training. They need a repeatable method.
-
Fold the top edge back before filling
This keeps sauce, marinade, blood, or oil off the sealing area. -
Settle the product low in the pouch
Don't let bulk sit too close to the top. Leave room for a flat, clean seal. -
Check the seal strip every run
Crumbs, fat, or debris on the machine can mark or weaken the seal. -
Watch for wrinkles before closing the lid
A tiny crease can become a slow leak. -
Use a double seal when the machine allows it
This gives extra insurance on heavier or wetter packs.
A bench-top chamber machine such as the Yasaki commercial bench top vacuum packing machine is designed for this style of repeatable sealing in commercial prep environments.
Adjust the machine to the bag and product
Heat and seal time aren't universal. Thicker or tougher bags may need more energy to form a reliable seam. Delicate bags can distort if settings are too aggressive.
Signs the settings need attention:
- the seal peels apart too easily
- the seal looks narrow or incomplete
- the bag mouth shows burn or warping
- vacuum is inconsistent across similar packs
A quick test batch at the start of prep is worth doing, especially when changing bag stock or switching between dry and wet products.
Handling liquids and wet product
Liquids are where many operators come unstuck. Product movement during vacuum draw can climb into the seal zone fast.
A few methods help:
- Pre-chill or partially freeze liquids before sealing
- Use shallower fills instead of overloading one bag
- Pause and monitor the draw on products likely to boil or surge under vacuum
- Wipe and inspect every bag mouth before the final seal
A strong seal should survive stacking, transport, and chilled storage without needing a backup container.
When packs fail repeatedly, don't blame one factor too quickly. Check the bag spec, the machine settings, and the filling method together. In most kitchens, seal problems come from that combination, not from a single obvious fault.
Extending Shelf Life and Reducing Food Waste
This is the part that matters most to most kitchen managers. Are vacuum packaging bags worth paying for?
The answer depends on what the kitchen is sealing and how disciplined the operation is. But the business case is rarely about saving space alone. It's about protecting ingredients that are expensive to replace and easy to lose through slow spoilage, drying, oxidation, or poor rotation.
Where standard storage falls short
Cling film and lidded containers are fine for short-term holding. They're less effective when a product is repeatedly opened, moved, and exposed to air.
That's when familiar problems show up:
- proteins discolour
- cut surfaces dry out
- odours move between products
- cheese degrades after opening
- batch prep gets relabelled, repotted, or forgotten
Vacuum packaging bags don't fix poor stock rotation, but they slow down the quality loss that open storage accelerates.
The strongest use cases in a Kiwi kitchen
Current product information often misses the actual NZ commercial question, which is whether vacuum sealing pays off in reduced waste rather than just neater storage. As noted in Vesta Precision's discussion of vacuum seal bag differences, food waste remains a significant issue nationally, and the strongest hospitality case is often fewer discarded proteins, cheeses, and prepared foods.
That lines up with where operators usually see the biggest practical gain.
Proteins
Portion steaks, chicken, fish, mince blends, and trim packs before they sit exposed in the coolroom. Product stays organised by date and portion size, and staff are less likely to open a tray “just for one more piece”.
Cheese and charcuterie
Once opened, these items often decline steadily in standard wrap. Vacuum sealing helps hold them in a tighter environment and cuts down the number of half-used packs going dry or mouldy.
Batch-cooked prep
Sauces, soups, braises, and fillings are easier to hold and rotate when packed in service quantities. That also frees container space and reduces the clutter that leads to forgotten stock.
Where vacuum sealing helps less
Vacuum packaging bags are useful, but they aren't the answer for every product.
They're less compelling for:
- dry goods that already hold well in sealed bins
- items that staff open and use constantly all day
- products damaged by compression
- operations with weak date-labelling and poor cold-chain habits
If the kitchen can't maintain storage discipline, vacuum bags won't rescue the process. They work best when they support an already organised system.
Waste reduction comes from the combination of packaging, labelling, cold storage, and rotation. Remove one and the result weakens.
Think in avoided loss, not bag cost
The wrong way to assess vacuum packaging bags is by unit price alone. The right question is simpler. Which products cost the kitchen the most when they have to be binned early?
If the bag protects an expensive cut, an opened block of cheese, or a full batch of prepared sauce, it doesn't need to save much product to justify itself. That's why kitchens that track waste properly often keep vacuum packaging for their most vulnerable stock first, then expand from there.
Food Safety for Vacuum and Sous Vide Cooking
Vacuum sealing improves storage control, but it also changes the food safety picture. Once oxygen is reduced, some of the usual visual cues become less useful, and time-temperature control becomes more important, not less.
That matters most with sous vide and any other reduced-oxygen packaging process involving chilled holding of cooked or low-acid foods.

The bag doesn't make the food safe
A common gap in bag marketing is that “leak-proof” and “puncture-resistant” get treated as if they're safety claims. They're not. As outlined in Sorbent Systems' information on vacuum seal bags, operators need to understand which materials and handling practices are suitable for reduced-oxygen packaging, especially for low-acid foods, where poor time and temperature control can create significant hazards.
That means vacuum packaging bags have to be treated as one part of a controlled food safety system.
What kitchen managers need to lock down
A safe vacuum and sous vide process relies on procedure. The essential requirements are straightforward.
- Use food-grade bags suited to the job. If product is being heated in-bag, the pouch must be appropriate for that use.
- Control temperatures tightly. Sealed food can't sit around while the team gets busy.
- Chill rapidly after cooking when the process requires chilled storage. Slow cooling creates avoidable risk.
- Label sealed packs clearly. Date, product, and handling status need to be obvious.
- Keep storage times under active control. “Still looks fine” isn't a safe rule in reduced-oxygen packaging.
For kitchens running immersion cooking, a unit such as the Sirman Sous Vide Wi-Food Immersion may form part of the process, but the machine itself doesn't replace the need for documented handling, chilling, and storage controls.
A practical checklist for NZ operations
Kitchen managers should make sure the food control plan or HACCP-style programme covers at least these points:
-
Approved products
Decide which menu items may be vacuum packed and which may not. -
Bag selection rules
Separate standard storage pouches from any bags intended for in-bag heating. -
Packing procedure
Define who seals, when they seal, and how packs are labelled and verified. -
Cooling and chilling method
Document how cooked sealed product moves from cooking to safe chilled storage. -
Storage and rotation
Keep sealed product grouped, dated, and checked like any other high-control item. -
Corrective action
Staff must know what happens if a seal fails, a label is missing, or a chilled product goes out of range.
If the kitchen can't prove control over temperature, labelling, and storage, it shouldn't be vacuum packing low-acid foods for extended chilled holding.
What works and what doesn't
Vacuum packaging works well when the kitchen has disciplined prep, controlled chilling, and clear labelling. It works badly when staff treat it as a shortcut.
It doesn't replace:
- proper cooking validation
- rapid chilling
- refrigerated storage discipline
- product traceability
- staff training
For sous vide in particular, the safest mindset is strict and boring. That's good. Reduced-oxygen packaging should feel procedural. If it feels casual, the process probably isn't tight enough.
Supply Cost and Disposal Considerations
Friday service is two hours away, prep is stacked up, and a batch of packed protein has to be redone because the bags from the latest carton are splitting at the corners. The bag looked cheaper on paper. It just turned into labour cost, product loss, and a delay the pass will feel later.
That is why purchasing needs to focus on total operating cost, not only the carton price. A low bag price means very little if the seal is inconsistent, the film varies between batches, or the bag is heavier than the job requires. In a Kiwi kitchen, the primary question is straightforward. Does this bag protect margin by reducing waste and rework, or does it create more of both?
What to assess in a supplier
A good supplier makes it easier to run a tight operation, not harder.
- Bag-to-machine compatibility. Chamber and external sealers need different bags. Get this wrong and staff waste time troubleshooting, double-handling product, or forcing poor seals.
- Consistent specification. Thickness, seal performance, and finish should stay stable from carton to carton. Consistency matters because teams build their prep flow around what worked yesterday.
- A disciplined range. Too many sizes and film types confuse staff and increase picking errors. Too few options push the kitchen into using oversized or overbuilt bags, which lifts cost per pack.
- Reliable supply. Stockouts usually lead to workarounds. Those workarounds often mean shorter shelf life, messier storage, and less control over portioned product.
The best buying decision is usually boring. The bags arrive on time, run cleanly through the machine, and do the same job every week.
Disposal needs a commercial view
Vacuum bags are consumables. They help cut food waste, but they also create packaging waste, so both sides of the equation need to be managed responsibly.
The practical approach is to reduce material use where the kitchen can:
- choose a bag size that fits the portion without excessive trim
- avoid using high-barrier or heavy-gauge bags where a standard storage bag will do
- keep clean offcuts and general waste separate from contaminated food-contact waste where possible
- check local soft-plastic and commercial waste options before making disposal claims to customers or staff
Selecting the right bag at the time of purchase often leads to the most cost-effective disposal results. If a kitchen over-specifies every pack, it pays twice. The first cost occurs during the initial purchase, and the second happens when throwing more material away.
The bottom line
Vacuum bags earn their place when they reduce food waste, support safe handling, and keep prep moving without failures. Buy too cheaply and the hidden costs show up in split corners, bad seals, repacking, and discarded product. Buy too heavily across the whole menu and the kitchen burns money on material it does not need.
Good operators standardise the few bag types that match their menu, review packing failures, and keep ordering tight. That approach protects margin and keeps the vacuum pack system practical enough for staff to follow during a real service week.
Hospitality supports NZ hospitality operators with commercial kitchen equipment and consumables across food prep, refrigeration, storage, and service. For kitchens reviewing vacuum packaging bags, bench-top sealers, sous vide equipment, or broader back-of-house workflow needs, Simply Hospitality is one local option to compare as part of a practical purchasing process.