

Meat Tenderiser NZ How to Choose the Right Method
A lot of kitchens don't start out looking for a meat tenderiser because of the meat. They start looking because prep has become repetitive. A few schnitzels, steaks, or portioned cuts done by hand is manageable. A daily pile of them, especially in a busy service operation, can turn into an awkward mix of labour, inconsistency, and extra handling.
That's the core decision behind meat tenderiser NZ searches in hospitality. It isn't just about which tool works best in theory. It's whether product + throughput + available labour + workflow now point to a different method, or to no tenderising at all. A common issue seen in commercial kitchens is buying a tool before deciding whether the cut truly needs mechanical tenderising in the first place.
Some operators are better off sticking with a hand tool and tighter prep discipline. Others reach the point where manual work becomes a bottleneck, and dedicated equipment starts making sense because it standardises the process and reduces repetitive handling. The underlying problem is usually broader than one tool, which is why articles on the hidden cost of slow prep and how the right approach fixes it often resonate with chefs and owners reviewing prep flow.
Practical rule: If the same tenderising task happens often enough that staff rush it, avoid it, or produce mixed results, it's no longer just a knife-and-bench issue. It's a workflow issue.
Introduction Is Manual Tenderising Becoming a Bottleneck
A small bistro flattening a few veal-style portions before lunch doesn't face the same decision as a caterer prepping trays of meat for repeated functions, or a rest home kitchen portioning protein for a structured production run. The right answer depends on volume and frequency, not on whether a blade unit looks more commercial than a mallet.
What changes when prep volume rises
Manual tenderising usually breaks down in three places:
- Consistency slips: One staff member hits harder than another, or works unevenly across the cut.
- Prep time drifts: What looks quick per portion becomes a meaningful block of labour across a week.
- Handling increases: Meat moves around the bench more, especially when staff flatten, trim, season, and tray up in separate steps.
That doesn't automatically mean a machine is required. It does mean the kitchen should stop treating the task as invisible labour.
Not every cut needs tenderising
One of the biggest mistakes in this category is assuming every steak, schnitzel, or grill portion benefits from mechanical intervention. In the New Zealand market, tenderness has already improved through supply-chain management in many products. A New Zealand retail study of 4,371 beef, lamb, and pork samples found shear force fell by 21.9% for beef and 17.2% for lamb over three years, with a consistent decline in tough samples. The same work also noted that many pork loins were already classified as tender or very tender (New Zealand retail tenderness study).
That matters commercially. If the cut already performs well, extra tenderising can add handling, cleaning, and food-safety complexity without improving the plate.
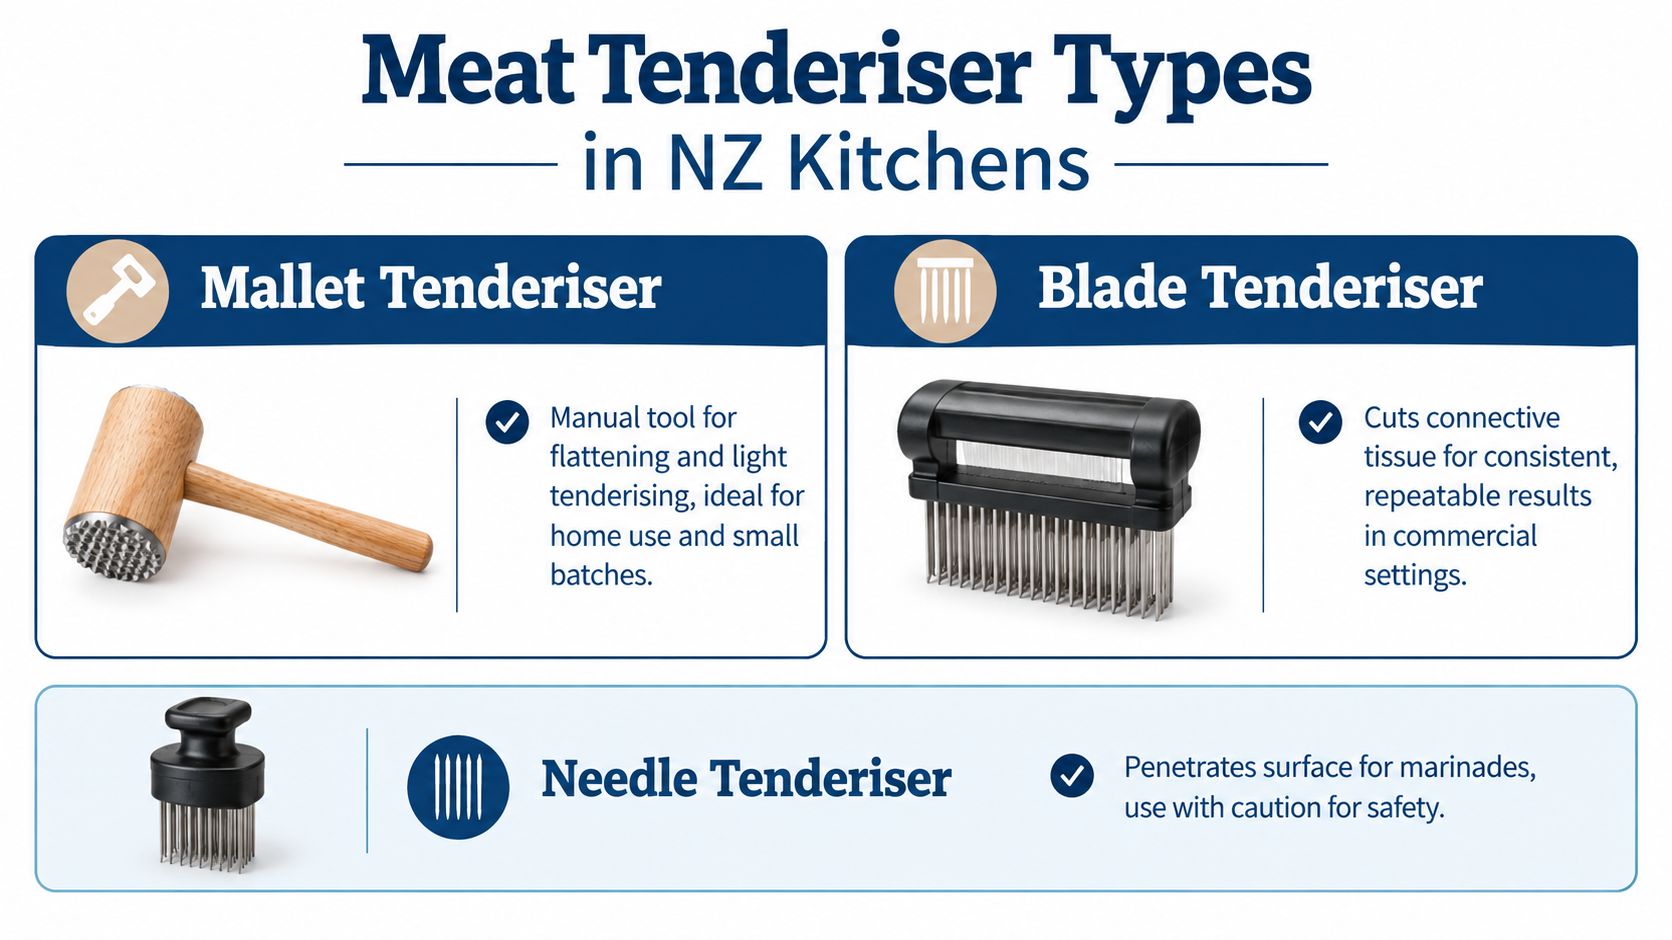
What Meat Tenderisers Do and the Main Types in NZ Kitchens
The most useful way to compare tenderisers isn't by price bracket or popularity. It's by what they physically do to the meat, and how that fits the kitchen's prep volume.
Many operators reviewing must-have prep equipment for commercial kitchens find that tenderising sits in the same decision category as slicers, mixers, and processors. The question is less about novelty and more about whether a repeated prep step deserves dedicated equipment.
Mallet tenderisers
A mallet is the simplest option. It works well where flattening and light tenderising happen together, such as schnitzel-style portions or cuts that need more even thickness before cooking.
A mallet suits kitchens where:
- Batch sizes stay small: Prep is occasional rather than constant.
- Flattening is part of the goal: Thickness control matters as much as tenderness.
- Storage needs to stay simple: No powered equipment, no moving parts, minimal setup.
The trade-off is repeatability. Two people can produce quite different results with the same mallet.
Blade and needle tenderisers
Blade tenderisers and needle tenderisers do a more defined job. They penetrate the surface and mechanically disrupt structure inside the cut, which can make the process more repeatable than pounding by hand.
Blade tools tend to suit operators who want:
- More even preparation across portions
- Less distortion of the cut's shape
- A process that can be repeated the same way during prep
Needle tools can also be relevant where penetration is part of a broader production method. That's different from replacing a mallet.
A blade or needle tool isn't automatically “better” than a mallet. It's better only when the product and prep process actually benefit from that style of penetration.
Commercial mechanical tenderisers and specialist systems
Once prep becomes repetitive, dedicated mechanical tenderisers start to make sense. These are less about one chef's technique and more about production discipline. They're useful where multiple portions need similar treatment, day after day.
Specialist injector systems belong in a narrower category again. They should be chosen around a specific production process, not treated as a default alternative to a basic hand tenderiser.
Where knives are part of the same prep station, storage matters too. The Yaxell Japanese Wooden Katana Sheath, maple for Kiritsuke Knife is a dedicated storage solution designed to protect sharp edges and reduce contact damage between uses. In practical terms, support items like this help keep a prep area safer and more organised when sharp tools are moving in and out of service.
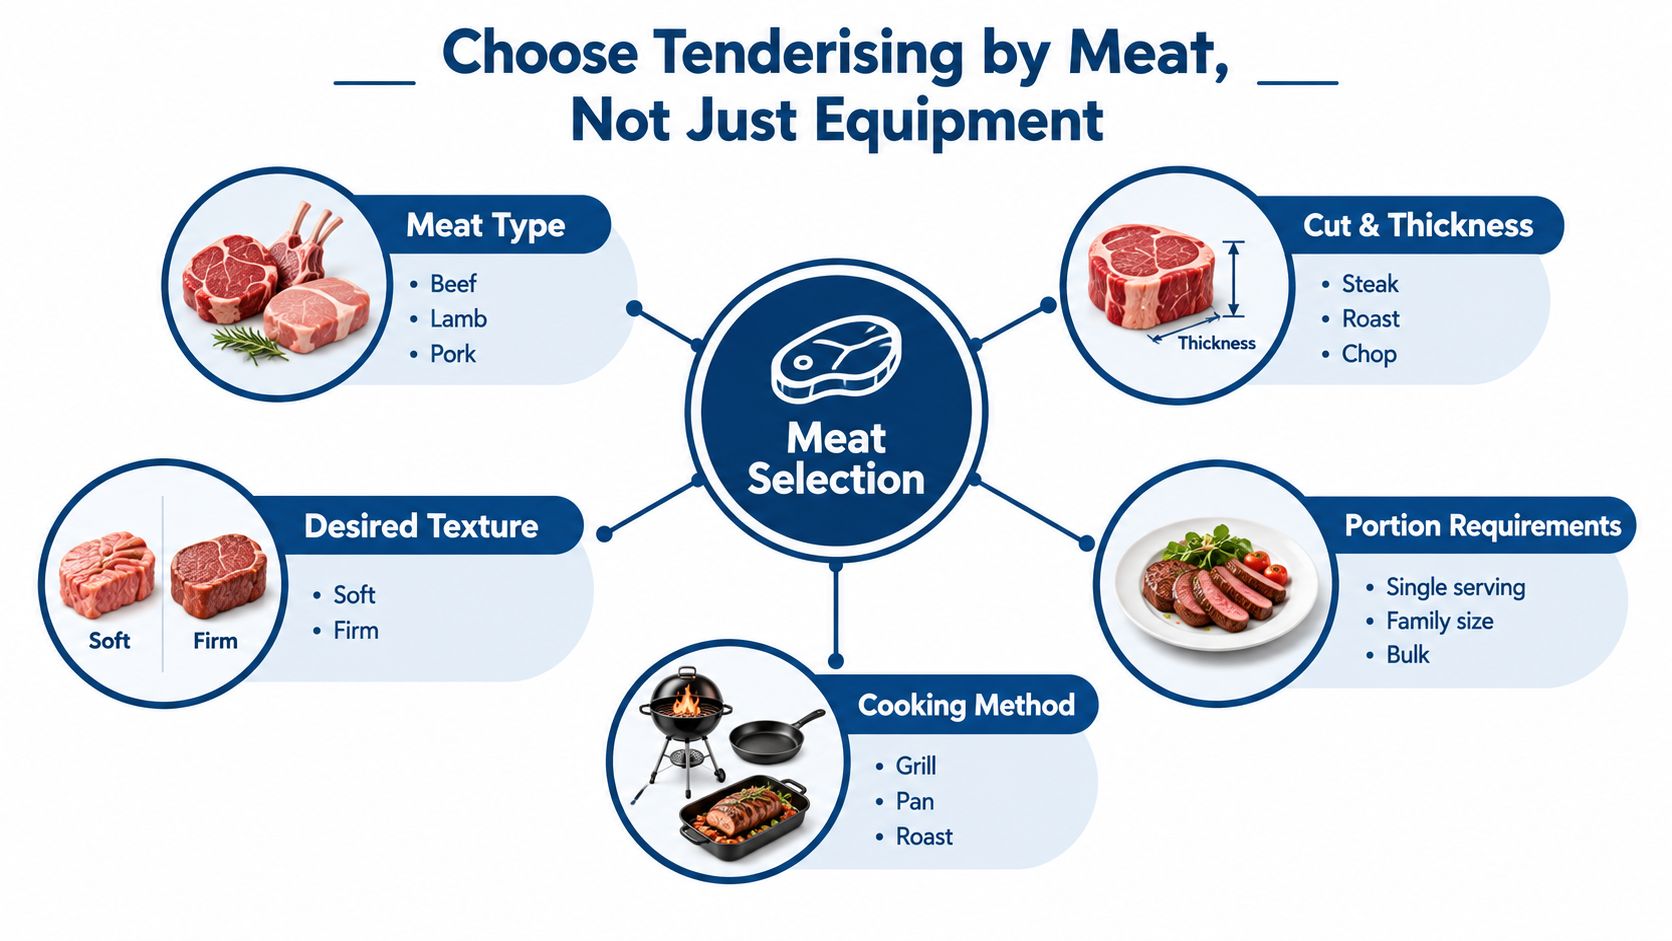
Choosing by Product Not Just Equipment
A tenderiser decision should start with the meat, not the catalogue. Hospitality businesses often find they get to a better answer faster by working through the product itself before comparing tools.
The same principle sits behind a lot of buying decisions in food prep equipment. Understanding differences with domestic, semi-commercial and commercial equipment helps frame why. A tool that's technically capable isn't always operationally appropriate.
Start with these five filters
-
Meat type
Beef, lamb, pork, and poultry don't all respond the same way. Nor do they carry the same workflow implications. -
Cut and thickness
A thin portion that only needs evening out is different from a thicker cut that needs a more controlled internal effect. -
Desired finished texture
Some dishes need a softer bite. Others need the cut to hold a firmer eating texture and a clean appearance. -
Cooking method
Pan-frying, grilling, roasting, and high-volume service cooking all reward different prep choices. -
Portion requirements
If the goal is visual consistency on the plate, that may matter as much as tenderness.
Beef and lamb in NZ kitchens
In New Zealand kitchens, beef and lamb are natural parts of this conversation. But geography doesn't create a special rule. The cut and the dish still decide the method.
A grill steak, a crumbed portion, and a sliced cooked meat application won't all benefit from the same treatment. Some cuts are already suitable as they are. Some need flattening more than tenderising. Some benefit from mechanical intervention only because the venue needs every portion to cook in a narrower band of consistency.
When not to tenderise
Plenty of operators save themselves trouble by avoiding default tenderising.
Skip mechanical tenderising when:
- The cut already performs well: Extra handling may add no real plate benefit.
- The finished texture could suffer: Overworking meat can leave it feeling compromised rather than improved.
- The cooking method already suits the product: Tenderising shouldn't become a substitute for selecting the right cut.
- Food-safety controls become harder than the gain is worth: Especially relevant where penetration changes handling requirements.
Some of the best equipment decisions are non-purchases. If the product doesn't need intervention, the smartest move is often to leave it alone.
Working Out Whether Commercial Equipment Is Worthwhile
The cleanest way to judge this isn't by instinct. It's by turning the task into a simple labour calculation.
Use this equation:
Portions requiring tenderising × preparation time per portion × frequency = current labour requirement
That won't tell a kitchen what to buy on its own, but it does expose whether the task is occasional, regular, or becoming a production bottleneck. Many operators choose to compare that manual requirement with the capacity, setup time, cleaning time, and staffing needs of dedicated equipment before making a call.
What to compare
When reviewing manual versus commercial methods, focus on the things that affect ownership:
- How often the task happens
- Whether the same person must do it every time
- How much bench time it interrupts
- Whether output is consistent enough for service
- What cleaning and reset look like after prep
A separate but useful exercise is to look at acquisition planning the same way other prep equipment is assessed. For venues that need to stage purchases rather than buy everything at once, this overview of financing for restaurant equipment is a practical reference point for thinking through how equipment decisions are funded.
Manual Versus Commercial Tenderising Decision Matrix
| Decision Factor | Manual Hand Tool Fits When | Commercial Equipment Fits When |
|---|---|---|
| Product type | The cut only needs occasional flattening or light prep | The product needs a repeatable tenderising process |
| Throughput | Only a small number of portions are prepared in each prep window | Repetitive batches create a regular prep block |
| Labour | Staff can absorb the task without disrupting other prep | The task pulls labour away from higher-value work |
| Consistency | Small variation between portions is acceptable | Portion-to-portion uniformity matters for cooking and plating |
| Workflow | The tool can be used, cleaned, and stored quickly | A fixed station improves process flow |
| Maintenance | Minimal parts and simple wash-up are preferred | The venue can manage cleaning, inspection, and servicing discipline |
Signs the task has become commercial
Some kitchens don't need exact numbers to spot the change. The pattern is usually obvious.
Common indicators include:
- Prep gets delayed: Staff leave the task to the end because it's tedious.
- Quality varies by operator: Service sees mixed thickness or inconsistent bite.
- The process creates congestion: One bench or one team member becomes the hold-up.
- Managers keep revisiting the same complaint: The labour is small per portion but relentless over time.
The same logic appears in other food prep categories, which is why does a Robot Coupe pay for itself in labour savings for restaurant kitchens is useful reading even outside vegetable or sauce prep. Mechanisation becomes relevant when repetition starts controlling the day.
Food Safety Cleaning and Compliance for Tenderised Meat in NZ
Food safety is where tenderiser choice stops being just a prep preference. Blade and needle tenderising can penetrate the surface of meat, which means surface contamination can potentially be introduced further into the product.
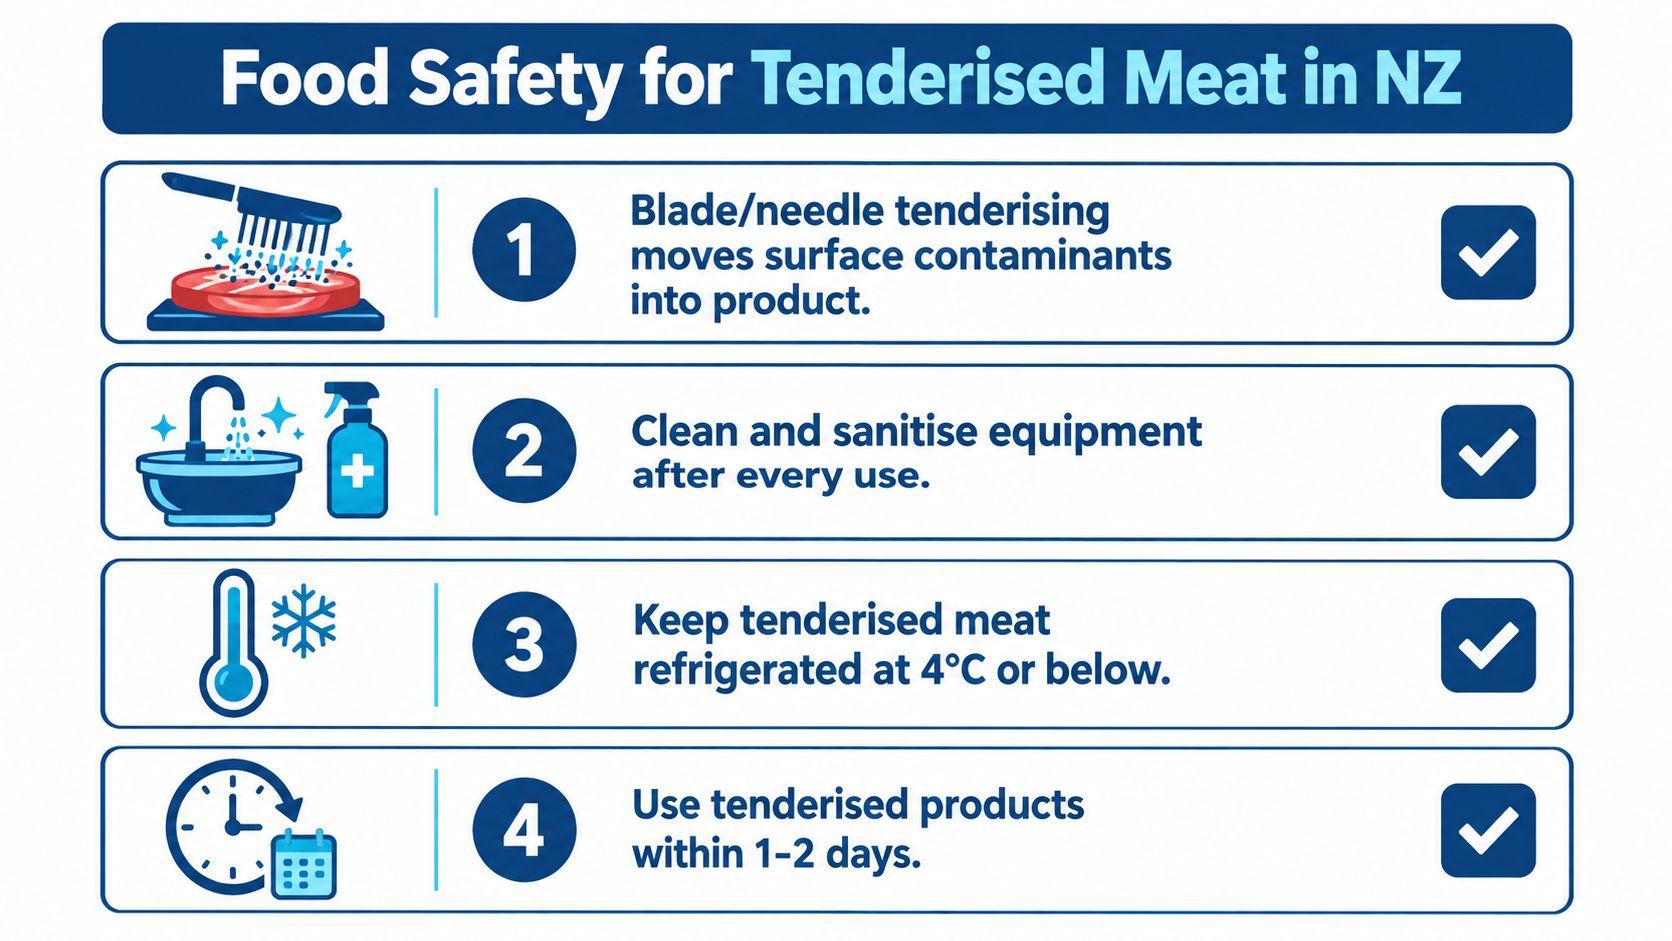
In New Zealand, that matters because mechanically tenderised meat is treated as a higher-risk product. New Zealand Food Safety advises that blade-tenderised steaks often show cut patterns on the surface and must be cooked right through, with a safe internal temperature target of 75°C for 30 seconds, or 70°C for 3 minutes, or 65°C for 15 minutes. The same guidance applies to chicken, tenderised meat, and minced meat products on the barbecue, and it also warns against assuming meat charred on the outside is cooked on the inside (New Zealand raw meat handling guidance).
What this changes in practice
Once meat has been mechanically tenderised, temperature checking stops being optional. For operators running grills, planchas, or barbecue service, a thermometer becomes a genuine control point.
That affects:
- Cooking validation: Staff need a consistent way to confirm doneness.
- Menu decisions: Rare-style expectations may not suit mechanically tenderised product.
- Service training: Front and back of house need to understand what can and can't be served under the same assumptions as an intact cut.
Char on the outside doesn't prove the centre is safe. That matters even more when the tenderising method has changed the risk profile of the cut.
Cleaning and cross-contamination controls
Tenderising also creates cleaning complexity. Blade heads, needles, housings, guards, and handles all need attention, especially where meat residue can lodge in small spaces.
Key controls include:
- Separate utensils: MPI's guidance reinforces using separate utensils for raw meat, or cleaning them in hot soapy water if only one set is available.
- Disassembly where applicable: If the unit comes apart for cleaning, staff need to know how and when.
- Safe handling of sharp parts: Cleaning injuries are common where blades or needles are rushed through wash-up.
- Manufacturer instructions: Cleaning methods vary, so staff should follow the maker's process rather than improvise.
- Raw-meat zoning: Keep tenderising stations clear of ready-to-eat prep.
A broader compliance point often gets missed. In New Zealand, businesses selling meat or meat products must comply with the Food Act 2014 and the Australia New Zealand Food Standards Code under the national system administered by the Ministry for Primary Industries. That places tenderised meat within a formal compliance environment, not just a kitchen technique (MPI introduction to meat processing requirements).
Operators wanting a wider refresher on documentation, hygiene systems, and food handling can also review food safety regulations in NZ.
A note on additives and shortcuts
Tenderising conversations sometimes drift into additives, preservatives, or “improvers”. Fresh meat has clear limits in New Zealand. Sulphur dioxide and sulphites are not permitted in fresh meat. They are only allowed in specified processed meat products, including processed comminuted meat, sausage and sausage meat, and certain manufactured meats such as salami and pepperoni (MPI food additive guidance for meat).
MPI has also specifically warned that sulphites found in fresh red meat are not allowed to be added to fresh meat, and its 2020 investigation sampled 10 Auckland butcheries and grocery stores after concerns were raised about preservative use in fresh meat (MPI media release on sulphite investigation).
Fitting Tenderising Into Your Kitchen Workflow and Space
A commercial tenderiser doesn't just need a spot on the bench. It needs a place in the process.
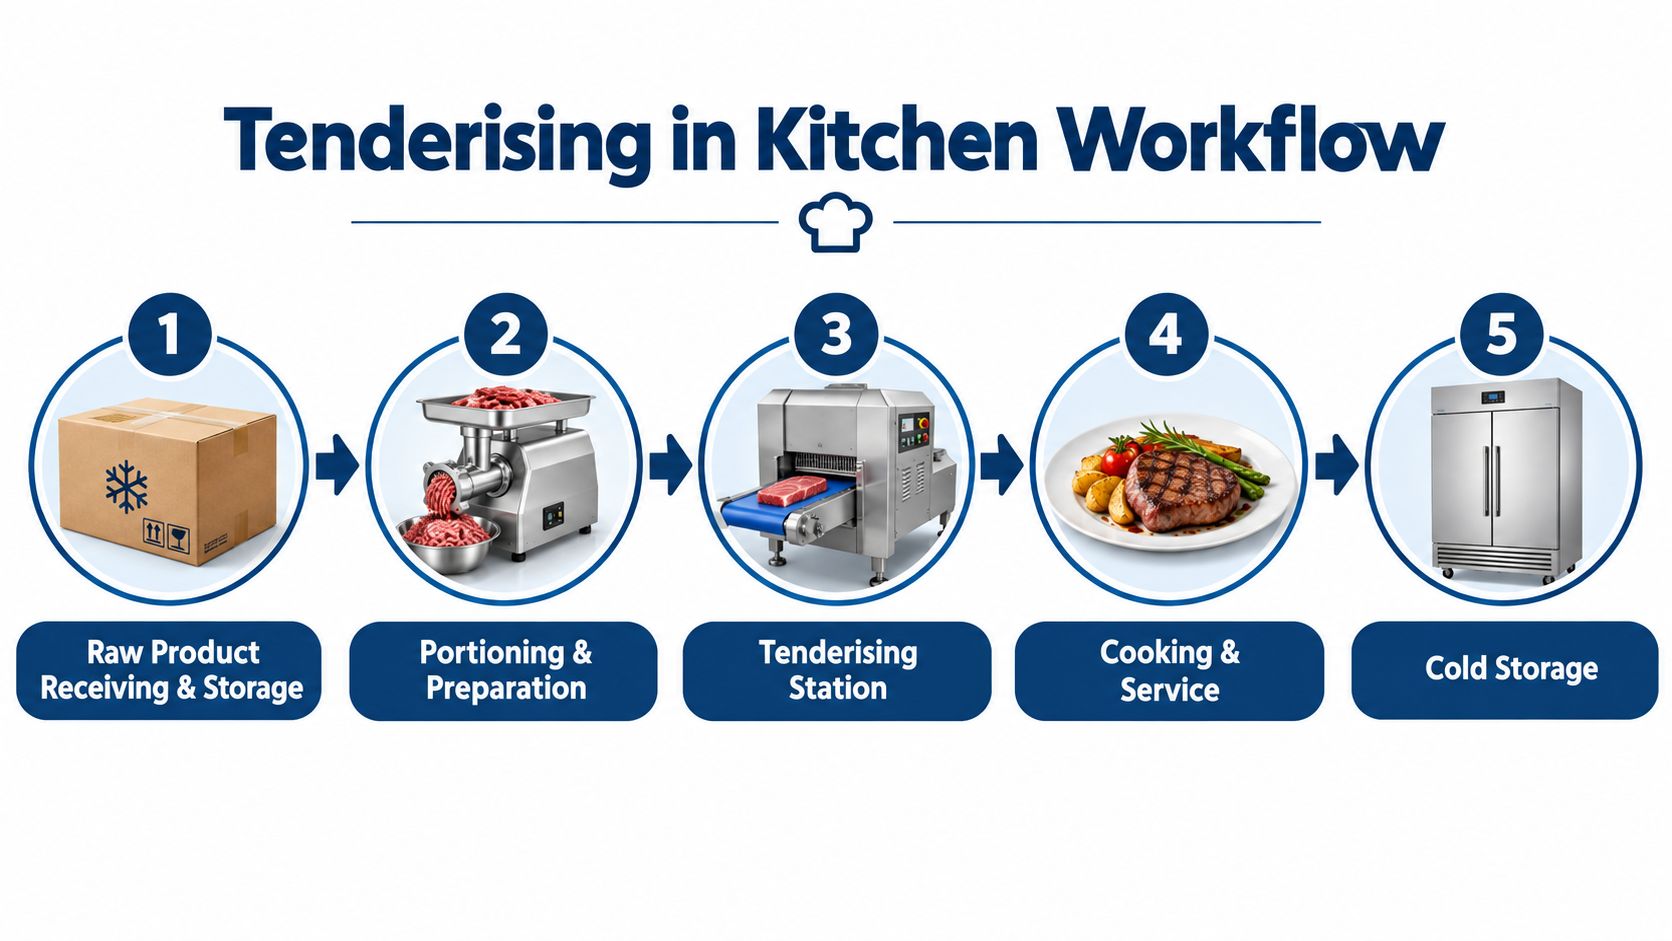
For larger setups, the useful sequence is usually raw product → tenderising → portioning or further preparation → storage or immediate cooking. If staff need to double back across the kitchen with raw product, the machine may fit physically but still work poorly operationally.
Workflow questions that matter
Before specifying any larger unit, check these points:
- Bench space: Is there enough clear landing area before and after the machine?
- Cleaning access: Can staff reach the sides, underside, and removable parts properly?
- Power and placement: If the model is powered, does the location support safe use without trailing cords or awkward movement?
- Product travel: Where does raw meat come from, and where does it go immediately after processing?
- Storage of accessories: Guards, trays, and removable parts need a defined home.
The machine has to fit the prep line
A common mistake is choosing purely on footprint. Small isn't always efficient if staff have nowhere to stage product, nowhere to clean parts, and no clean route back to refrigeration or the cooking line.
This is also where the wider prep setup matters. Tenderising often sits alongside portioning, knives, boards, trays, shelving, and cold storage. Hospitality carries a broad range of commercial food-preparation equipment and support items, which is relevant because tenderising rarely works as a stand-alone purchase in a busy kitchen. The station only works well when the surrounding workflow is organised too.
Making the Right Choice for Your Venue and Next Steps
The right meat tenderiser NZ decision usually becomes clear once the venue stops asking which tool is best and starts asking where the bottleneck is. If only a small number of portions need occasional flattening or light prep, a manual mallet may be entirely appropriate. If the same task repeats across service cycles and different staff, dedicated commercial equipment may be the better fit because it brings more control to the process.
The biggest mistakes are predictable. Tenderising every cut by default. Buying a machine because it looks efficient without checking cleaning, workflow, and storage. Treating product types as interchangeable when the cut, thickness, finished texture, and cooking method should drive the decision.
For restaurants, caterers, hotels, schools, hospitals, aged care kitchens, and similar operations, long-term ownership matters as much as the purchase itself. Cleaning discipline, blade or component handling, servicing support, local supply, workflow fit, and staff training all affect whether the equipment helps or just adds another awkward station.
A sensible shortlist should include:
- Product suitability: Does this meat need tenderising?
- Throughput reality: How often is the task repeated?
- Labour impact: Is prep time becoming a bottleneck?
- Kitchen fit: Can the tool or machine be cleaned, stored, and used properly?
- Compliance: Does the chosen method change food-safety controls?
If the answer is still unclear, that usually means the venue needs a workflow conversation before it needs a product decision.
Hospitality helps New Zealand hospitality operators work through those equipment and workflow decisions with a practical view of prep, cleaning, compliance, and kitchen fit. For help comparing manual and commercial tenderising options, or fitting meat prep into a wider equipment plan, visit Simply Hospitality.